Compare the following two images.
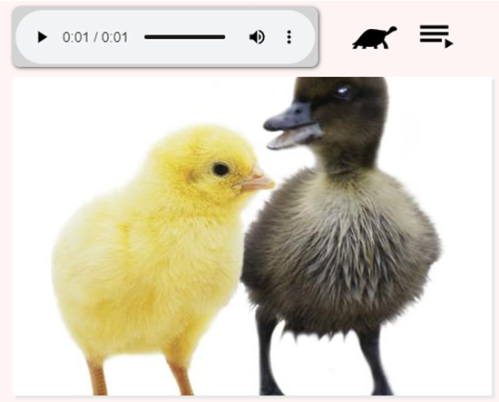
In the first image, notice how the ducks head is chopped off, and the feet of both birds have also been chopped off, which doesn't look very good:
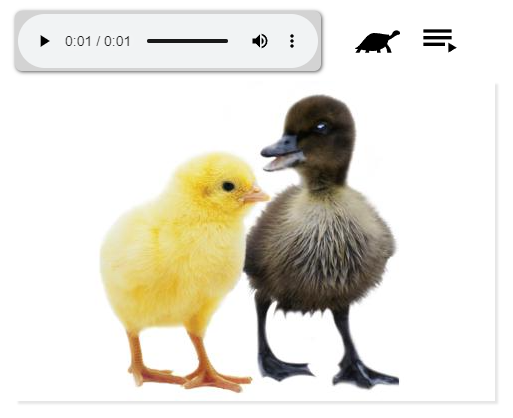
In the second image, notice how both birds display fully, which looks great:
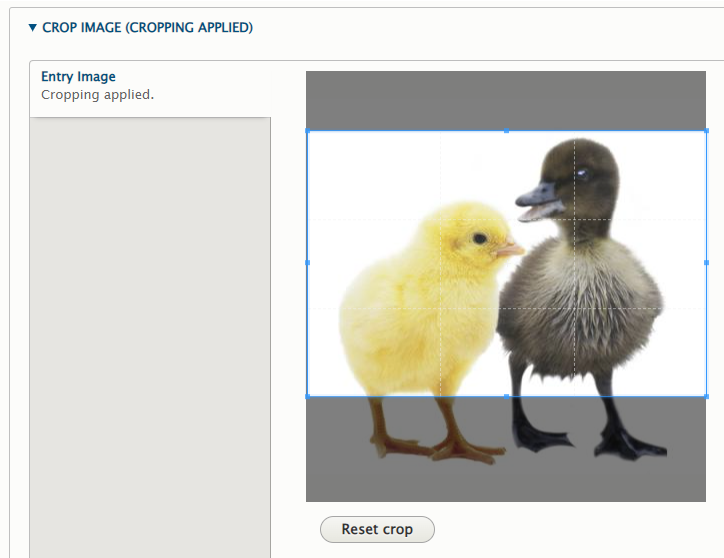
The problem is that the original image is square, and so no matter how you use the Lingopolo "CROP IMAGE" tool, you can't see all the body of the ducks:
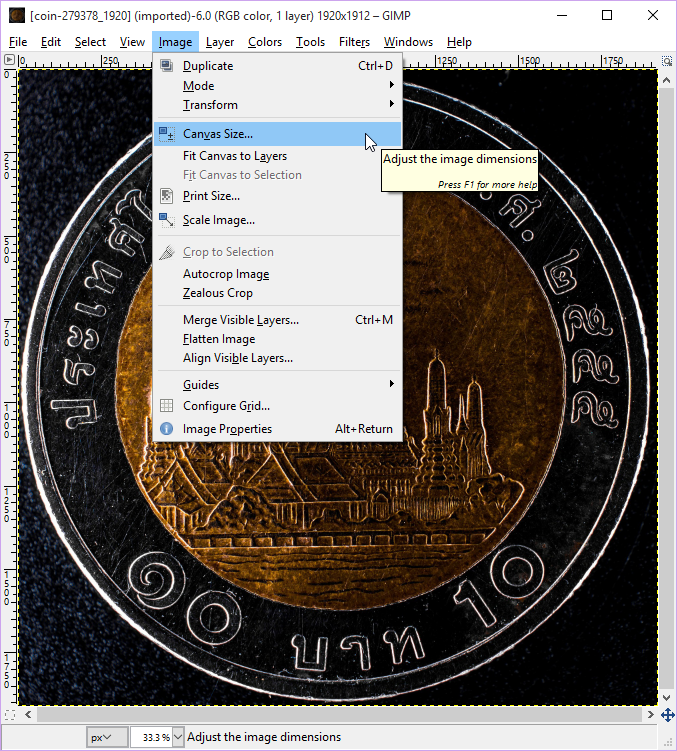
What to do? Firstly we can use GIMP to expand the canvas size:

Then we can use GIMP to fill the edges with the background colour. Notice, of course, that this technique will only work well when the background is only a single colour such as here where it is white:

See https://lingopolo.org/thai/word/a-chick-and-a-duckling for the finished entry.
Changing the Canvas Size with GIMP
Normally changing the aspect ratio of a page as described on the Using GIMP to change the aspect ratio of a photo page is fine. Sometimes though, particularly for photos which are naturally square, e.g. the clock face used for "five to two" or the photo for a coin, cutting the original to make it smaller through cropping the original into a 3:2 rectangle will not give a very pleasing result. In that case it may be necessary to expand the canvas size. This is a little trickier, particularly since you have to be able to fill the space which is added, but is often possible.
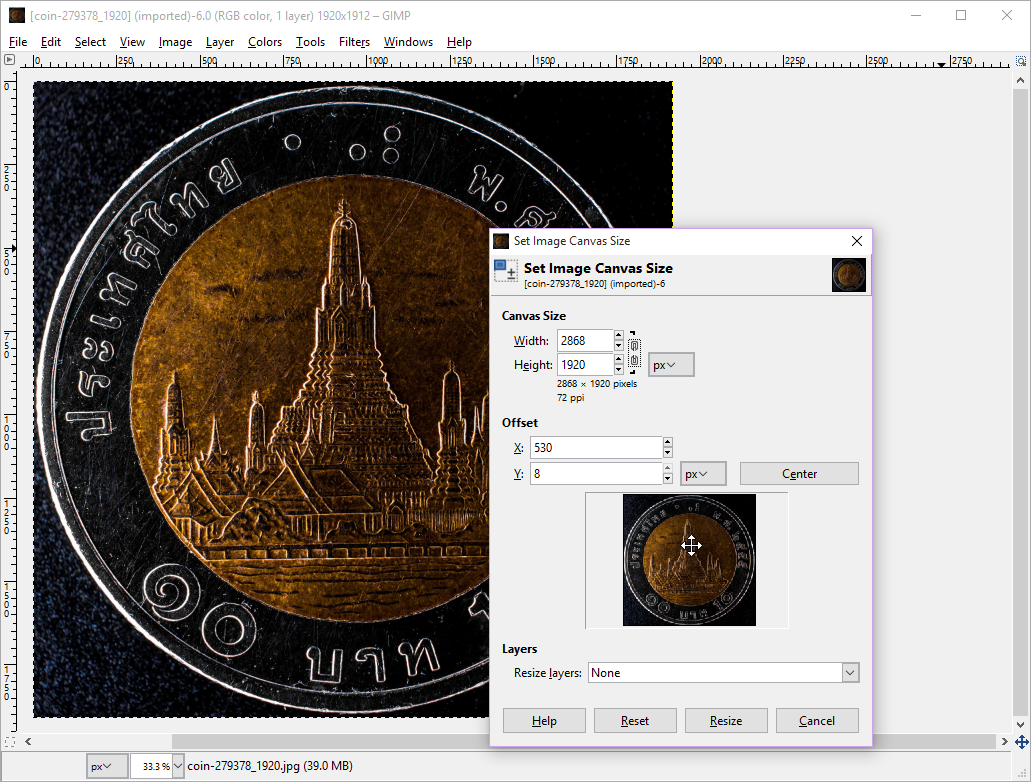
For example, starting with this pixabay photo for a coin which has originally the dimensions of 1920x1912, we select Image and then Canvas Size:
The next step is to state the new Canvas Size required. The calculation for this is done using the Aspect Ratio Calculator described on the help page about ratios.
Note that you can set where in the new, bigger canvas, where the original image will go. Often you will want to put it in the centre, but there may be cases where you want it a bit more or a lot more to one side or the other.
For the coin image, we make the X offset so that the old image will appear in the centre of the new canvas, with a more or less equal space either side:
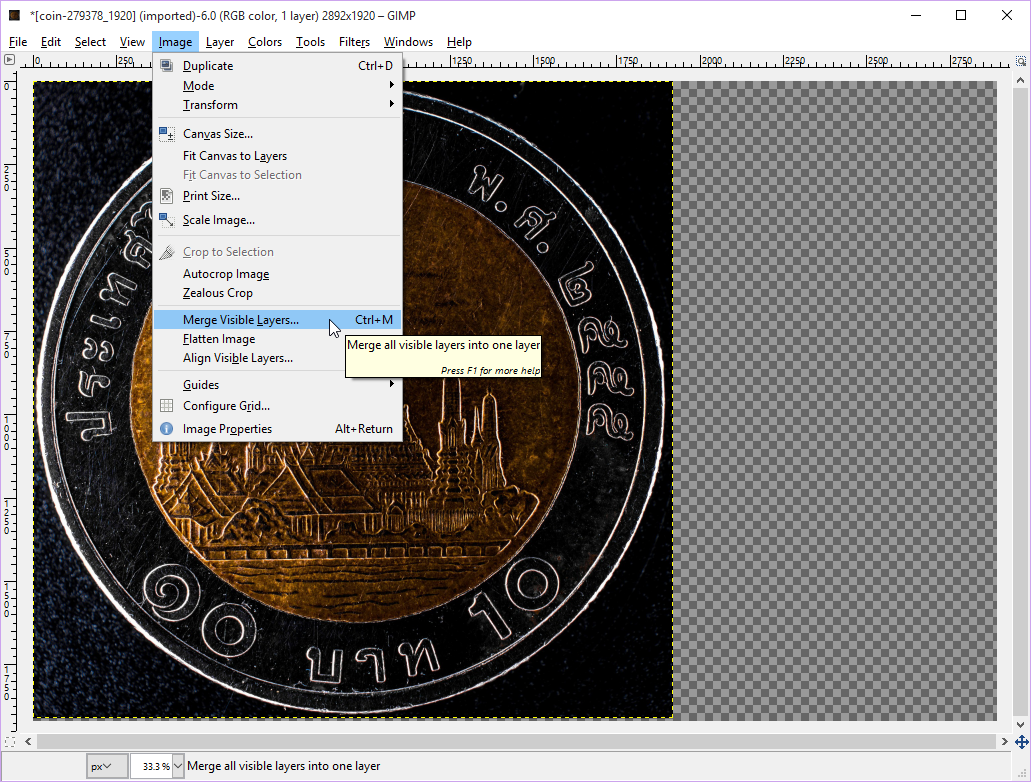
The image will now have several layers, one background layer, and one layer with the original image on. We want to turn the photo into a single layer. To do this, select "Image" and then "Merge Visible Layers...".
The final step will be to fill the spaces at either side with the appropriate color(s). This depends on the exact photo and the requirements. In the case of this coin, the clone tool was used to copy the different types of colour. The clock was simpler, since just adding the same white colour (selected with the colour picker tool) was enough.
There are many different ways to fill the space correctly and many different tools you might need. Please see the GIMP help for full details on how to use each tool.